
Ways to Connect Your Roku to Wi-Fi
Posted May 26, 2020, 12:55 p.m. by Emil S.The Roku company’s line of digital media devices makes it affordable and a snap to stream your favorite movies and shows. But first, they need Internet access before you can enjoy more than 5,000 channels that are waiting to stream to your home.
Three Types of Roku Devices
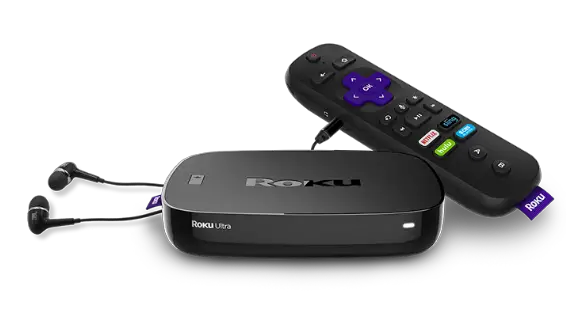 The Roku Box is one of the easiest ways to stream media and connects to a television via the HDMI port. A Roku TV, however, has the Roku operating system built-in and can stream content straight out of the package. Both these products connect to routers via Wi-Fi or Ethernet connection to gain Internet access.
The Streaming Stick has a more compact design than the Box and also plugs into a free HDMI port. It, however, can only connect with a router via Wi-Fi.
First Time Wireless Roku Setup
As mentioned earlier, all these types have a Wi-Fi link.
- In case you have the Box, connect it to the supplied HDMI cable. Connect the Box or Streaming stick to the HDMI port of your TV or home theater receiver.
- Connect the round plug of the AC adapter into the Roku. Newer models have a micro USB port for power. Plug the adapter into an outlet, and turn your Roku on.
- If you have a Roku TV, just plug it into an outlet and power it on. Make sure to also turn on your regular TV.
- Go to your TV settings and set it to receive signals from the corresponding HDMI port.
- Insert AAA batteries into the included remote.
- With the remote, you can choose a language, after which you can set up an Internet connection.
- Roku gives you a choice of a “Wired” or “Wireless” connection.
- Be sure you have your Roku TV or Box connected via cable to your router’s Ethernet port before you select the “Wired” option. It would try to access the Internet shortly, and you should be good to go. Selecting “Wireless,” however, is a bit more involved.
- If it’s the first time your Roku is connecting to the Internet wirelessly, it will try to find any available Wi-Fi network within range.
- A list of all available Wi-Fi connections will appear on the screen. From this list you can pick your network.
- There’s a “Scan again…” option in case you can’t find it, and it should be available on the following list.
- Once you’ve selected your network, Roku will begin diagnostics on both the Internet and Wi-Fi connections. If it fails, be sure you picked the right network.
- If a connection is possible, the Roku will ask for the password. Enter it and select “Connect.” It will confirm the Wi-Fi link and should now have Internet access.
- It will begin scanning for the latest software and firmware updates. You must download to install them for a better experience. The Roku may need to reboot after this before the changes can take effect.
- After it’s done updating, you can proceed with any further setups or start streaming.
Connecting Roku After the First Time Wi-Fi Setup
Using your remote, you can follow these steps if you’re switching your wired Roku device to a wireless connection, or if you like to connect it to a newer wireless network.
- Press the Roku remote’s “Home” button.
- Select “Settings” at the top, then select “Network” also at the top of the drop-down list.
- Choose “Set Up Connection,” and you’ll be on the same screen for choosing the connection type.
- Choose the “Wireless” option.
- Roku will begin searching for available Wi-Fi networks.
- When the list of networks appears, choose the right network.
- After entering the correct password, Roku will confirm if there’s a successful connection.
Connecting Roku to a Hotel or Dorm Wi-Fi
Because of their portability, you can take the Roku Box or Streaming Stick and hook it up to a Dorm or Hotel room TV. Both devices will need a Wi-Fi connection, so be sure the place has one and that the TV has an HDMI port.
- The first order of business is to know the network password.
- Connect your Roku to the TV’s HDMI port, plug it into an outlet, and switch it as well as the TV on.
- Press the remote’s “Home” button.
- Navigate to “Settings,” select “Network,” and then “Set Up Connection.”
- Choose “Wireless.”
- Once there’s a connection, it will ask where you are. Choose the one with the “dorm” option.
- It will ask you for this network’s password and will show you another password and it will let you access the Roku servers.
- You can enjoy streaming once it confirms the wireless setup.